

Forms let you collect the same information the same way every time: intake questionnaires, site-visit checklists, activity reports, feedback, and so on. There are two jobs here: first you build a form (the design), then you deploy it so people can fill it. This guide covers both, step by step. You will find it in the Case Manager, under Forms in the left sidebar.
Three words to know: a Template is the design you build once. A Form is that template put to work for a chosen group of people. An Entry is one filled-in copy.
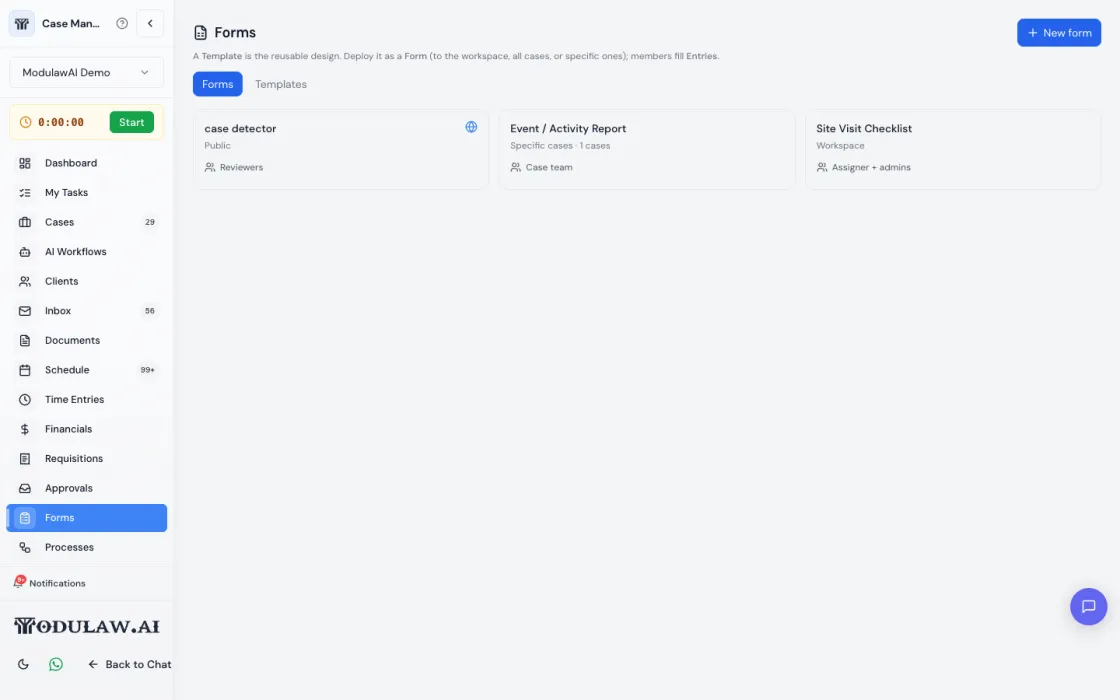
Part 1, step by step: build a form template
- In the Case Manager, click Forms in the left sidebar.
- Click the Templates tab near the top.
- Click New template at the top right. The builder opens.
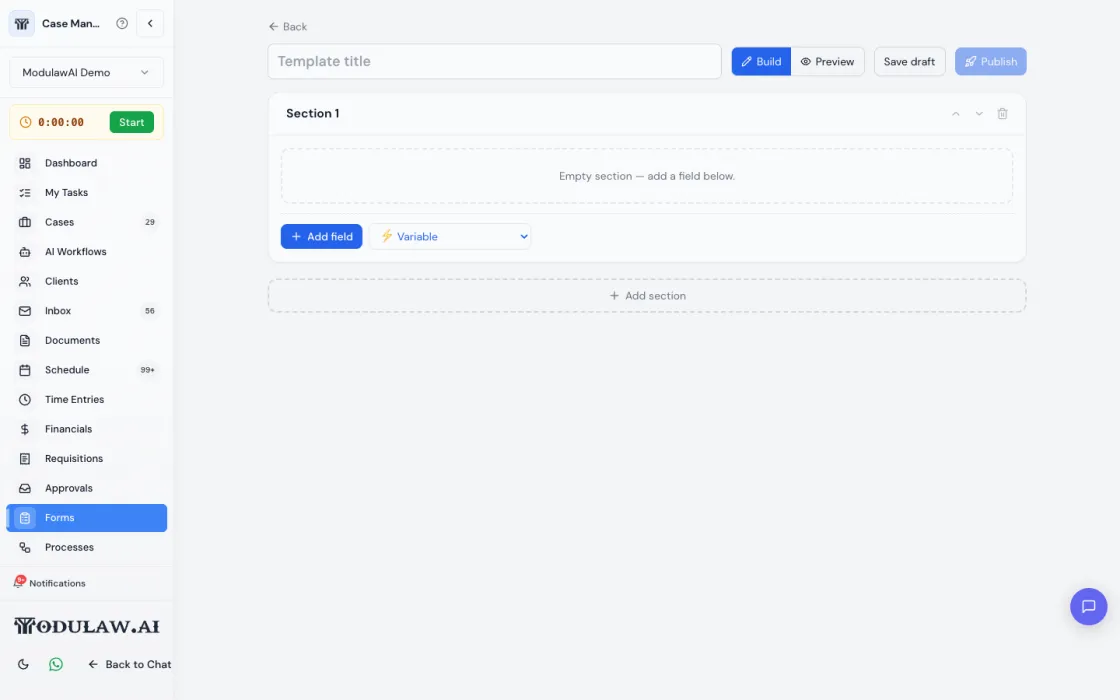
- Type a title in the box at the top, for example “Site Visit Checklist”.
- You start with an empty “Section 1”. Click Add field to add your first question.
- Pick the field type from the dropdown next to it (for example a short text box, a choice list, a date, or a signature), then give the field a label. Repeat Add field for each question you need.
- To group questions under headings, click Add section and add fields inside it.
- Click Preview at the top to see and test the form exactly as people will fill it. Click Build to go back to editing.
- When you are happy, click Publish. (Use Save draft instead if you want to finish it later.)
Shortcut: you can also ask the AI assistant in chat to build a form for you, then publish it here.
Part 2, step by step: deploy the form so people can fill it
Publishing a template makes the design ready. Deploying it decides who actually fills it.
- Go to the Forms tab (next to Templates).
- Click New form, then choose the template you published.
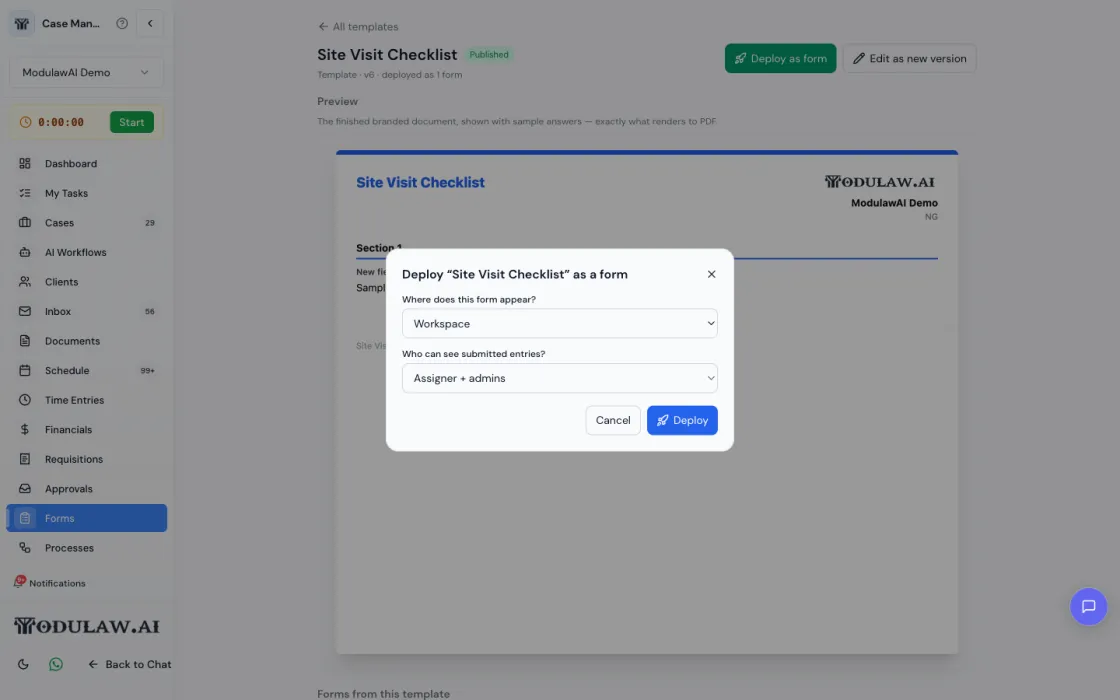
- Choose the scope, that is, where it applies:
- Workspace: available across the whole firm.
- All cases or specific cases: attached to matters.
- Public link: anyone with the link can fill it, no login needed.
- Choose who can fill it and who reviews the entries.
- Confirm. The form now appears in the Forms list, and the people you chose can start filling it.
- Each submission becomes an Entry you can open, and entries can be exported to a clean PDF.
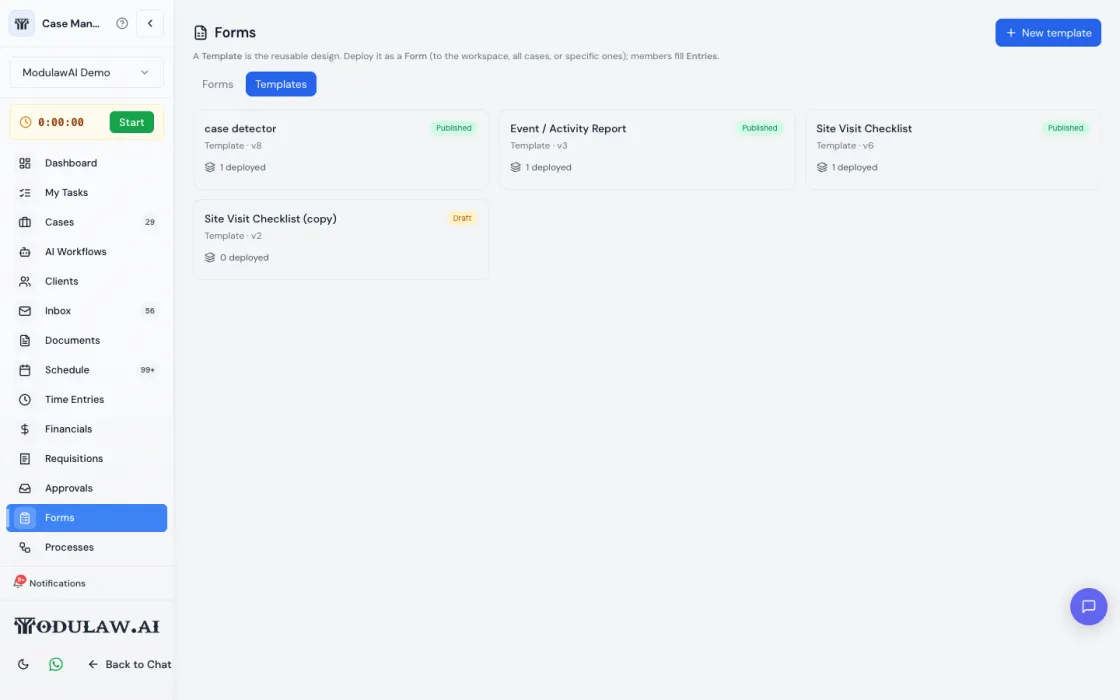
Good to know: templates keep their history
Every template has a version number and shows whether it is Published or Draft. You can keep improving a template and publish a new version, and forms you already deployed keep working. So you can fix a typo or add a question later without breaking anything already in use.
A form can also be one step inside a bigger procedure. See the Processes guide for how a form becomes a step people are asked to complete in order.
Who can use it
Forms are available on all plans and to all roles by default. The module can be turned on or off per workspace in Settings, then Modules, and also appears as a tab inside an individual case.